So last weekends Weta Halloween Party was a blast, and my boyfriend and I took away Best Group Costume for the night with these xenomorph suits we made. Our flatmate also won out - with Best Male in a felt Bender costume. Nice to be living with fellow creative folks!
I thought I'd post up a few in progress and final pics, since I know if you're anything like me, you'll want to know how to make one of these babies yourself. There are a few home-made xeno guides on the internet actually, but here are a few tidbits of my own that will help you on your way to going full alien.

About 5 Law textbooks, 10 reels of shiny black tape, eight salvaged vacuum cleaner pipes and heads (from the thrift store for $4 ea), 3 spools of any sort of thick gauge wire, four bottles of PVA, Two black vinyl jackets (also from thrift store or Trademe/Ebay), a needle and black thread, a black plastic folder, 2kgs of air-drying clay, some used cardboard fries boxes sourced from McDonalds, four cans of black gloss spraypaint, superglue, a pair of black satin gloves, countless insulation pipes, black gardening pipes, and some of those small ribbed pipes (from the local hardware store), two backpacks, two cycling helmets, and a few hunks of polystyrene went into the making of the two Xenomorphs.

We began with the heads, using a cylindrical wire frame over balloons and then applying four coats of paper mache, as we wanted these things to be strong. As you can see, there is no paper mache on this side, the underside. This is because we were having trouble with the basic shape of the alien head, and decided to bend/push/prod the framework after we had one or two coats down.
Once we had reshaped the cylinders and applied the remaining coats of paper mache, we inserted bike helmets to rest on our heads, and cut paper mache balloons into domes for the front of the head, and for the penile back of the head. The back dome had to be bigger in its circumfrence than that of the cylinder it joined, so that a good penile shape was formed.
Here's a bit of a step ahead, but you can see what I mean by the back dome being bigger than the cylinder so that a lip is formed around the bottom of the head.
Once the shape of the head was looking right, I drew guide-lines along the length of the head for the details we would add. Here we are attaching bits of pipe.
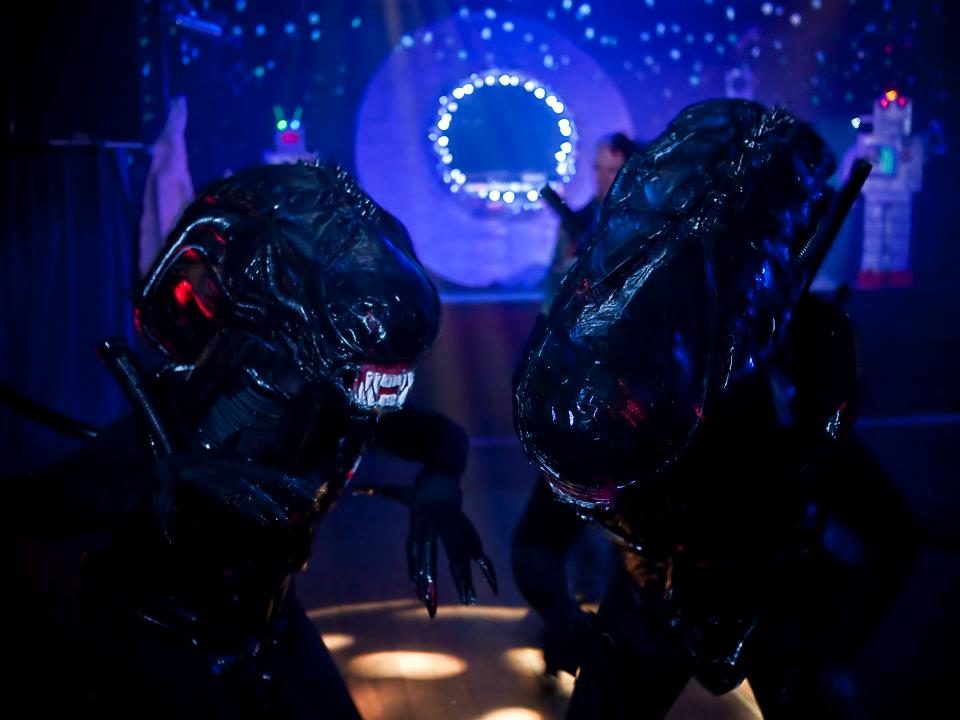
I added rutching detail in vinyl cutouts from the coats, and clay detailing for various tendons, spikes along the crown of the head, and the membranes around the mouth. The smaller black pipe details are just that - black pipe. My alien is the prettier one on the top btw ;-)
Once this was done, the headpieces sat and waited with the other bits for us to spraypaint. We spraypainted all pieces together, but here are some details of the heads pre-teeth.
James poses in his alien suit. Sadly there were no kids around to chase and scare :-(!
The whole suit idea was posing some problems until it occurred to us to take a visit back to the thrift store and buy two cheap black kids backpacks. The back area + straps were then cut off and the rest discarded, a cardboard chest (we could have used other materials here), affixed to the straps in the frontal area.
The frontal areas of the suits were done by constructing an exoskeleton of the various tubes and pipes we had salvaged. These were not very true to the xenomorph form, as we were running out of time very quickly and the party was approaching. James's suit differs to mine as we were each in charge of our own chestpieces and made them however we felt like at the time!
Back to the construction - an important feature of the Xenomorphs is the shoulder-pipe area. This was all wrangled with bits of tape really, and then vacuum cleaner heads (very nicely curved pipes) sawn to the right lengths and four attached to each of the alien's backs.
My suit had only two back pipes for awhile, we had to go and buy some more.
James was in charge of the tails, which were made from insulation pipe and moulded styrofoam (for the barbs). The spiny bits were made with bits of cardboard. These were then spraypainted.
My job was the hands, which were extended satin gloves sewn onto our bodysuits (I forgot to mention that we bought two novelty black full suits made out of lycra). I hate sewing, so I tried to do this as quickly as possible! I used the thread to wind around the fingers for joints, and taped on some nails which I werent happy with in the end. I then moulded clay talons over the nails and spraypainted them for that glossy look.
Testing my costume
I don't have any photos of the feet, but they were constructed over black shoes (ninja tabi for me) with the remaining bits of black pipe. Aliens have six fingers and toes, so they had six long toe bones along the length of the shoes, carved into claws at the ends.
The teeth were shaped individually from clay and then superglued to the alien's mouth. I then used a hot glue-gun for bits of drool.
If we had had more time I had intended to use scraps of vinyl to do the scaly detailing all over the aliens arms and legs. Sadly it was party night, and time to show off what we had done ;-)


No comments:
Post a Comment